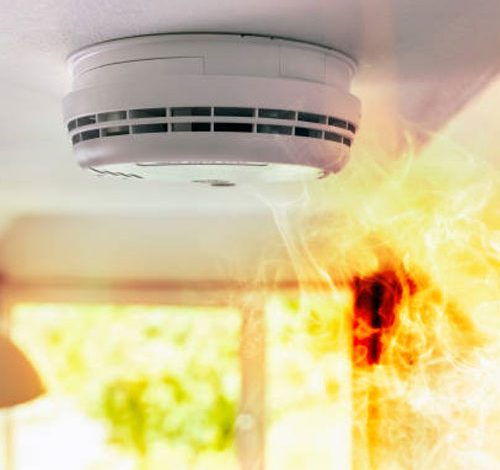
Installing a fire smoke detector is one of the most effective ways to protect your home, office, or commercial property from the devastating effects of fire. At Sri Triveni Crafts, we believe that proper installation is just as important as choosing a high-quality detector. Without correct placement and maintenance, even the best devices can fail to alert you in time. In this guide, we’ll cover the best practices for installing fire smoke detectors to ensure maximum safety for you and your loved ones.
Why Proper Installation Matters
A smoke detector is only as effective as its installation. Incorrect placement or failure to maintain your device can delay warnings, putting lives and property at risk. Fires can spread rapidly, and a few seconds can make the difference between a safe escape and disaster.
By following the best installation practices, you can ensure your detector works as intended and provides the earliest possible warning in case of danger.
Best Practices for Installing Fire Smoke Detectors
1. Plan the Placement Carefully
Before installation, assess your space and determine the optimal locations for your detectors. Proper placement increases the chance of early detection.
Key Locations to Install Detectors:
-
Bedrooms: Place one inside every sleeping area and right outside each bedroom.
-
Living Areas: Common rooms such as living rooms and dens should be protected.
-
Hallways: Install in hallways that connect to bedrooms.
-
Basements and Attics: Fires can start in less-frequented areas, so detectors here are a must.
-
Kitchens (with caution): Install detectors at least 10 feet away from cooking appliances to avoid false alarms.
2. Install on Ceilings or High on Walls
Smoke rises, so detectors should be installed on ceilings whenever possible. If mounting on the ceiling isn’t feasible, place them high on the wall—no more than 12 inches from the ceiling.
Ceiling Installation Tips:
-
Install at least 4 inches away from any wall.
-
If the ceiling is pitched, place the detector near the peak but at least 4 inches below it.
Wall Installation Tips:
-
Keep it between 4 and 12 inches from the ceiling.
3. Avoid Drafty or Humid Areas
Do not install detectors near windows, doors, fans, or vents. Air movement can prevent smoke from reaching the sensor. Similarly, avoid areas with high humidity like bathrooms, as moisture can trigger false alarms or damage the unit.
4. Use the Right Power Source
There are two common types of fire smoke detectors based on power:
-
Battery-Powered Detectors: Easier to install and ideal for areas without wiring.
-
Hardwired Detectors: Connected directly to your home’s electrical system and typically include a battery backup in case of power failure.
5. Interconnect Your Detectors
For added safety, consider interconnected smoke detectors. If one unit detects smoke, all connected alarms will sound. This is especially useful in multi-story homes or large buildings, ensuring everyone is alerted at the same time.
Installation Process: Step-by-Step
Step 1: Gather Tools and Read the Manual
Every detector is different. Before you start, read the manufacturer’s instructions carefully. Typically, you’ll need a drill, screws, a screwdriver, and possibly a ladder.
Step 2: Mark the Mounting Location
Using the mounting bracket as a guide, mark where the screws will go. Double-check that the location follows the best practices mentioned above.
Step 3: Install the Mounting Bracket
Drill holes where marked and insert the anchors if necessary. Screw the mounting bracket securely into place.
Step 4: Attach the Detector
Align the detector with the bracket and twist it into place. If it’s battery-operated, make sure the battery is installed correctly. If it’s hardwired, follow the wiring instructions provided in the manual.
Step 5: Test the Alarm
Press the test button to make sure the detector is working properly. Repeat this step monthly as part of regular maintenance.
Maintenance Tips for Long-Term Safety
-
Test Monthly: Press the test button to check the alarm.
-
Replace Batteries Annually: Even if they seem fine, change them at least once a year.
-
Clean Regularly: Dust buildup can interfere with sensors. Gently vacuum the outside of the detector.
-
Replace Detectors Every 8-10 Years: Check the manufacturer’s guidelines to know when to replace your device.
Conclusion
A well-installed fire smoke detector can be a life-saving device, offering you and your family the earliest possible warning in case of a fire. Following these best practices ensures that your detectors are placed where they are most effective, and that they remain in good working condition over time. At Sri Triveni Crafts, we provide high-quality fire alarm systems designed for reliable protection. Visit Sri Triveni Crafts to explore our range of safety solutions and take the first step towards a safer home or workplace.
Frequently Asked Questions (FAQs)
1. How high should a fire smoke detector be installed?
Ideally, fire smoke detectors should be installed on ceilings. If you need to place them on walls, they should be installed 4 to 12 inches below the ceiling.
2. How often should I replace my fire smoke detector?
Most detectors should be replaced every 8 to 10 years, even if they seem to be working fine. Over time, their sensors can become less effective.
3. Can I install a fire smoke detector by myself?
Yes! Many modern smoke detectors are designed for DIY installation. However, if you are installing hardwired or interconnected systems, you may prefer to hire a professional.
4. How many fire smoke detectors do I need in my house?
It’s recommended to install detectors inside each bedroom, outside each sleeping area, and on every level of your home, including the basement.
5. Will my fire smoke detector work if the power goes out?
Battery-operated detectors and hardwired detectors with battery backups will continue to work even during a power outage.


